Level Fittings With Lag Installation Guide
Share
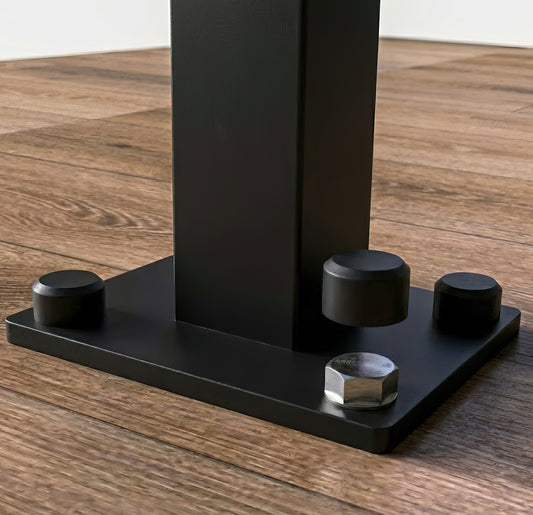
For Wood Posts
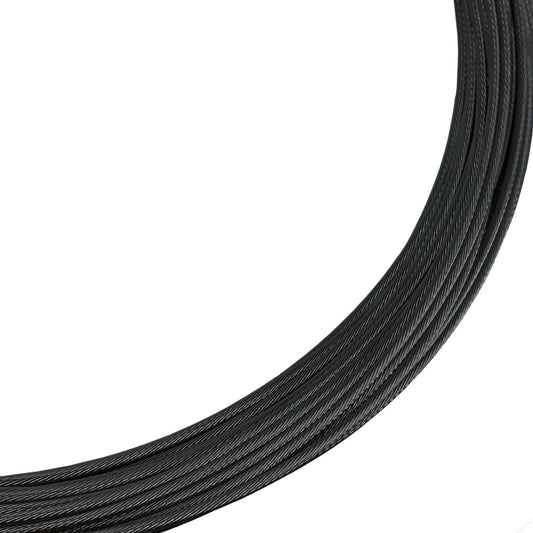
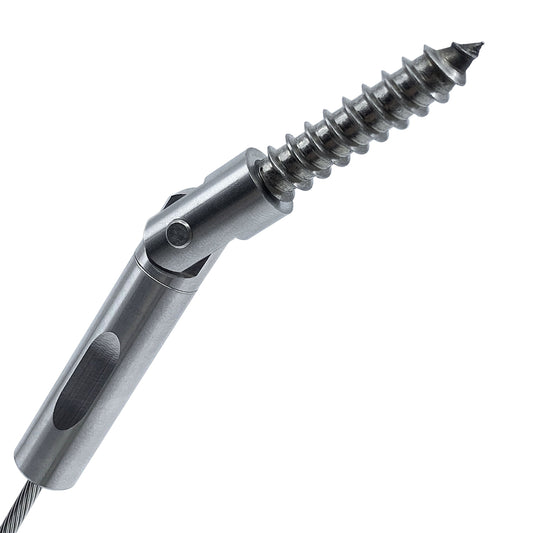
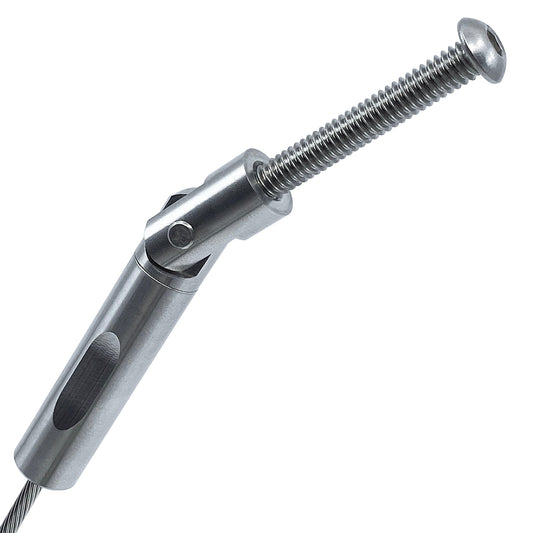
The Keuka Cable Level Fitting with Lag is designed specifically for mounting cable railing systems directly into 4x4 wood posts, wood columns, or even directly to a wood wall face. This system features a 2-3/8” stainless steel fitting that provides a sleek, modern look while maintaining the structural integrity required for safety.
Follow the video above and the instructions below to install your railing system using simple hand tools.
Components
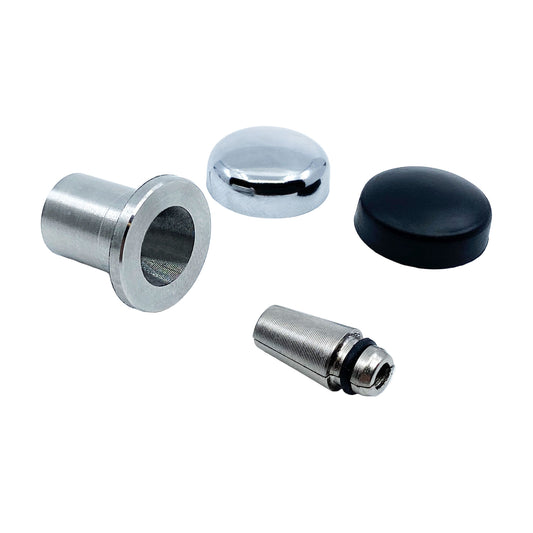
With every Level Fitting with Lag, you will receive:
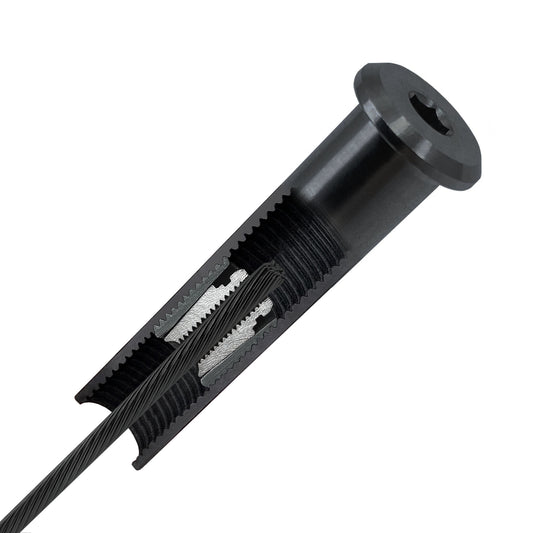
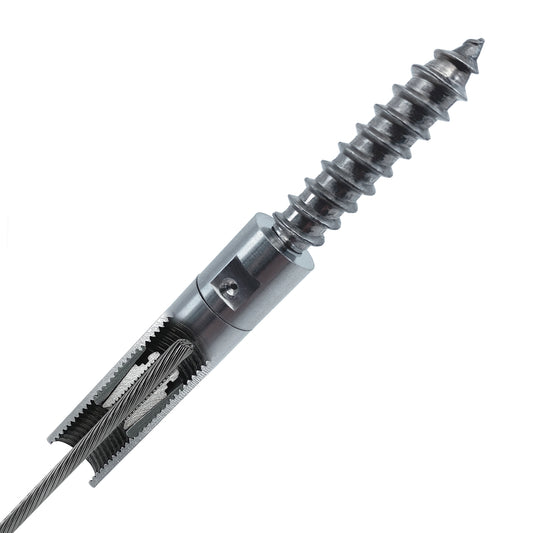
- Stainless Steel Fitting Body: 2-3/8” long.
- Threaded Stud: Used to lock the cable inside the fitting.
- Jaws: A pair of wedges held together by a rubber band (do not remove this band).
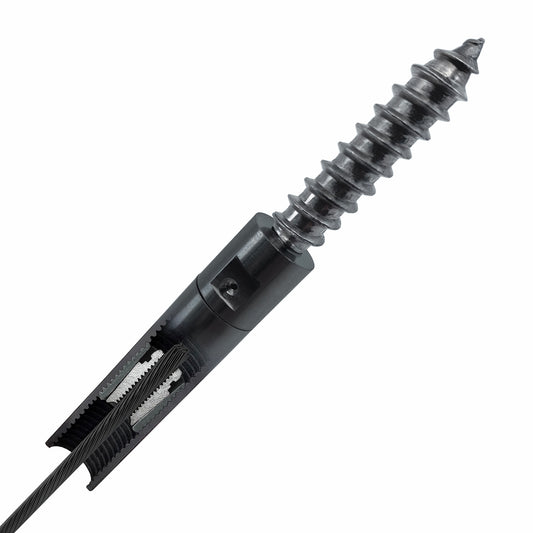
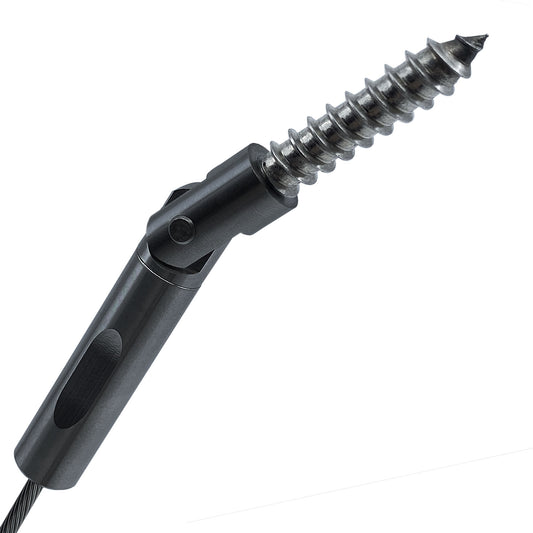
- Lag Screw: Your choice of either 3.5” or 1.5” length, depending on your mounting surface.
Tools Required
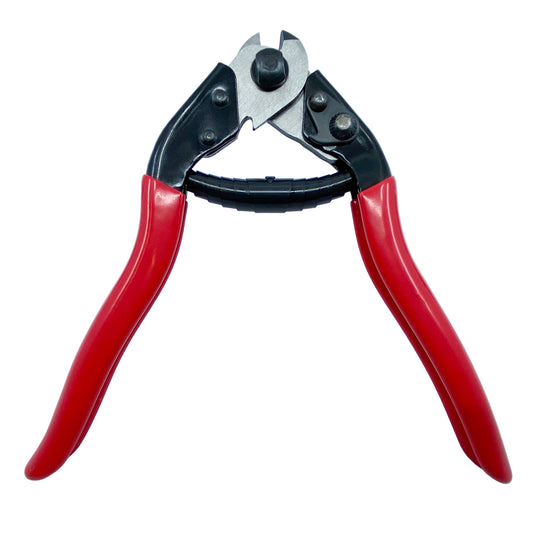
- Cable Cutters: A cutter with a beveled blade is highly recommended to ensure a square cut.
- Cable Gripping Pliers: Vise-grips with a machined end are best. Note: If using standard pliers, wrap the teeth in tape to prevent scratching the cable.
- Wrench: A 7/16” open-ended wrench for driving the lag and tightening the fitting.
Step-by-Step Installation
1. Install the Lags
Begin by driving the Lag Screw (hanger bolt) into your wood post. Start by hand to get it snug, then finish tightening it using your 7/16” wrench until it is securely seated.
(Note: Once the lag stud is installed, attach the stainless steel fitting body onto it if not already pre-assembled).
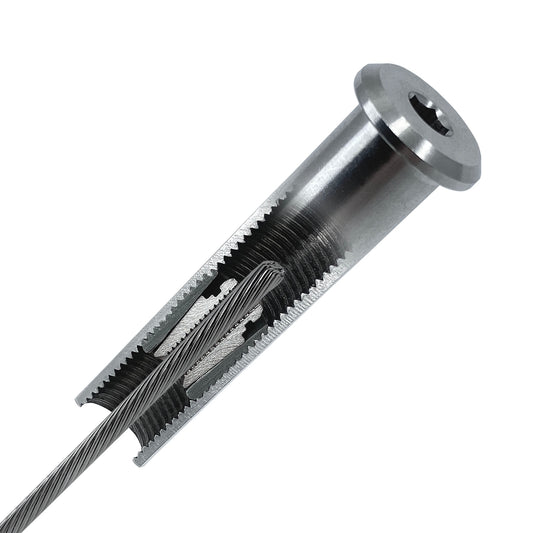
2. Assemble the Cable End
Slide the Threaded Stud onto the cable, ensuring the smaller end of the stud goes on first. Next, slide the Jaws onto the cable with your fingers, leaving approximately 1/8” of cable exposed at the very end.
3. Lock the Assembly
Pull the Threaded Stud back up over the Jaws. Pull firmly until you feel or hear a distinct "click." This indicates the jaws are locked into the stud.
4. Connect to the Fitting
Insert the cable assembly (stud and jaws) into the fitting body mounted on your wood post. Thread it in by hand until it is nice and tight. Ensure the stud is screwed at least halfway into the fitting so no threads are exposed.
5. Measure and Cut the Opposite End
Run your cable to the terminating post. Pull the cable tight to the end of the fitting, and then mark it to be cut 1/2 inch short. Cut the cable at this mark and repeat the assembly process (Steps 2 & 3) for this end.
6. Tension the System
Once both ends are connected by hand:
- Use your Cable Gripping Pliers to bite down and hold the cable steady (to prevent it from spinning).
- Use the 7/16” wrench to turn the fitting body.
- Tighten until the cable is taut and snug.
Maintenance Tip
One of the major benefits of this design is that the fitting mechanism remains exposed. If your wood posts shrink or shift over time and the cables lose tension, you can easily access the fitting with a 7/16" wrench to re-tighten the system without disassembling the railing.